Rectro
-
Posts
3,798 -
Joined
-
Days Won
102
Content Type
Profiles
Blogs
Forums
Gallery
Pipeline Tools
3D Wiki
Plugin List
Store
Downloads
Everything posted by Rectro
-
Day 4: This morning did the body, fitted the head. Will go back in later and add additional details such as belly button and ribs using edge loops in the right places. I dont intend to use any displacement maps so am pushing the modelling for topology to hold the forms. For the body I wanted to make sure the chest (Pectoralis Major), shoulders (Deltoids), and shoulder blade (Scapular) and a loop to hold these forms. Extra loops for knees, and elbows, although by the time I finish il more than likly refine alot. For now im fitting in 1.5 hour sessions per day.
-
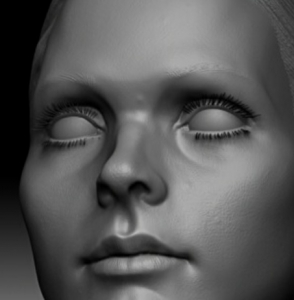
Last screen shots for tonight. I done a quick deformation test to see if I need any more edge loops, and and very happy with the topology for this head.
-
Thanks. At the moment iv got to get through the head and hair, then do some deformation tests for the mouth and eyes, then onto the body. Realy this part is the hardest, and the longest process depending on how far you want to go that is. Being this is my first modelling session ever in C4D im proper learning its strengths and weaknesses. Im going to keep the face and body textures simple for a basic cartoon look, but will put some detail into the accessories and weapons. The plan is to rig him, pose him in a warrior pose standing on a turf stand with rocks, grass around him. of course all of these plans depends on the time factor. By this Saturday I hope to have his full body modelled and head welded on. Dan
-
Day 3: Make eyes from two shells, the outer has no polls, and will use a transparency map to show the disk on the inside which is the Iris. The Teeth proved to be the longest session so far as I constantly ran into issues with C4D tools. I finished off today with getting the inner mouth covering the gums of the teeth. I would have not bothered with teeth if it where not the fact that a warrior snarl will show them.
-
Your welcome, glad it helps. I picked that up from Sabin Howard when I was on a course by him called Power and Grace, the Structure of Man. I will go and check his very words again, but he was saying that the side profile contains information that shows depth such as the distance between the nose, eyes, mouth, fantastic artist. Dan
-
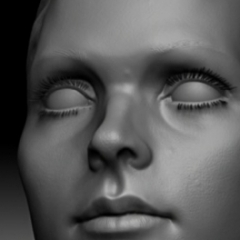
Quick update, showing with a shader on, and pushing the cage mesh a little harder to retain shape.
-
Thanks for your comments. I wouldn't say im a expert on Anatomy, but im learning a bit more everyday, its like the Pandora's box, or a hall of mirrors, there is no end, and the more you know, the more you realise how much you dont know. Its hard to answer your question fully, because there is so much I could point out on this, but the foundations are so important, and in this case the skull its the foundation. First the proportions must be right that being the height from chin to peek of skill and orbital bone of the nose to the back of skull which should be 7/8ths of the height. I covered this in my learning session so check that out. The 3/4 view gives alot away, as this profile will show the silhouette of the Brow bone, cheek bone, muzzle area, and chin. The likeness most comes from the side profile, if you get that right your onto a good start. This project is way out of my style of modelling, so its a nice change. Iv only done very basic forms at the moment, there is plenty to do, and I know what it is I need to tweak to get the balance between cartoon, and breaking anatomy too much. At the moment its just getting the concept features into the head with good topology, then its tweak, tweak and tweak some more. Dan
-
Day 2: Worked for just over a hour on Ears, Nose Mouth, Eye sockets. Being that the theme is cartoon I could spare myself realistic anatomy for ears which was nice. Im putting as much into the modelling as possible so it holds all its own forms without the need for displacement maps. Crits, comments welcome.
-
Any updates? look forward to seeing more. Dan
-
Nice going Vector.
-
Typically id normally use what I call a "creative process" in which Zbrush is where it all begins. I can create my concept without any topology restrictions (Dynamesh), all while zbrush being able to produce a relatively clean mesh while I work between stages (ZRemesher) which is Zbrushes way of Auto retopology. I don't need a pen and paper, I don't need a base mesh from another application, id use Zspheres to construct my base mesh. When I'm happy, over it goes into Modo where I retopologize, and make hands, feet, eyes, accessories. Modos modelling tools are much superior to C4D, not all tools, but most. It's not that C4D can't do the same as modo, it's just more awkward, slower, but MODO is not as intuitive overall C4D. C4d needs a good base mesh to sculpt on, Zbrush don't. For that reason sculpting in C4D is to speed up the process for getting organic forms in place fast, in this regard its much better than MODOs sculpting tools. Symmetry in C4D is terrible, yet so important, there also needs to be a re-symmetry tool as to avoid keep deleting half the model. There is no intelligent bridge tool so I can select multiple edges either side of a opening and bridge the gap, uv mapping in C4D is workable, not as good as Modo, as Modo not close to as good as unfold3d. Its swings and round abouts, overal I prefer working inside C4D despite it short falls. Its the small things that all add up, and for every small thing a work around has to be put into place, the slower I become, and I like to work at speed once I get into the zone. PS: For this project im not using anything other than C4D apart from Photoshop later on. Dan
-
Hi No I dont normaly, I had adopted a way better workflow which gives me far more creative freedom, and speed, and thats with other software, but being that this challenge is purely C4D, and I need to learn C4D tools better iv gone old school. Thanks, Dan
-
Right had a spare hour or so to get something done. I recorded it just for the entertainment factor. This is Part 1, base head modelling. I will go back and do some tidying up to topology later on, then add ears eyes e.c.t.
-
This is coming on really well, plenty of character, keep it up. Dan
-
Great! look forward to it. You wont have to keep up with me, iv not even started the modelling yet ,Vector is flying ahead.
-
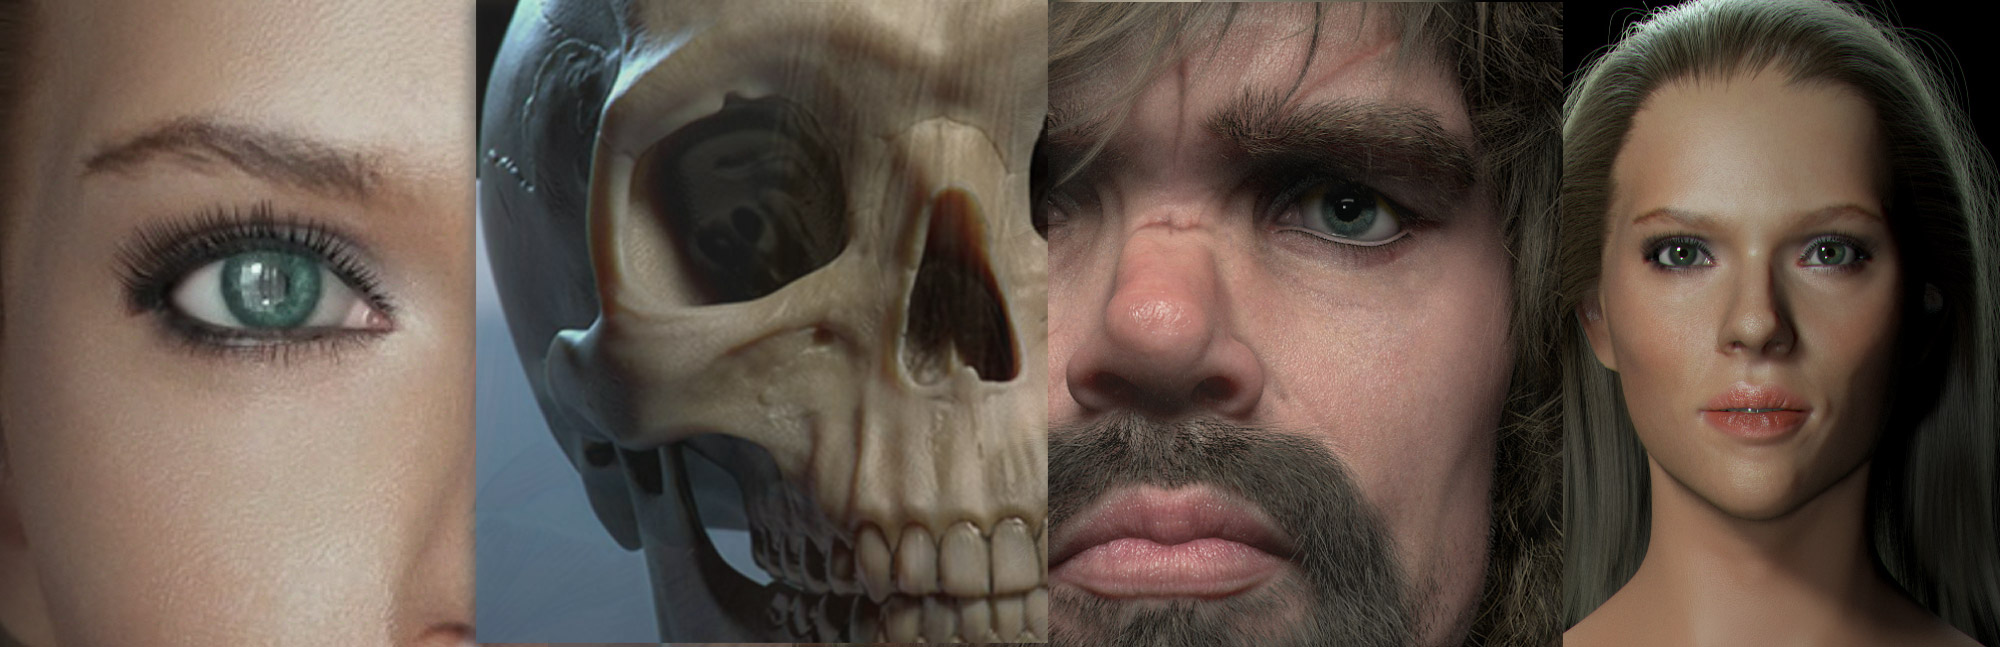
So am starting the Character modelling challenge with some ideas, concepts, back story to direct where this is going. Back Story: There was aboriginal young boy named Mirow , which means (A throwing Stick). he was 3 years old, and lived in the out back Australia during the mid 1700 after the Nepean war. His father Coen is a warrior who survived the war who has gained his reputation by saving the lifes of most of his tribe. Mirow's mother is Nadda who is loyal, and wishes Mirow to be like his warrior father when he is older. Mirows father teaches his son the basic skills to hunt, and survive, and by the age of 9 he has grasp many skills beyond that of the other children in his tribe, although he is still a young boy Mirow is strong, and a dedicated apprentice warrior who wishes to be like his father some day. Design: As he is a cartoon style character to meet the challenge requirements, I will keep his proportions initially correct using loomings 6 head tall canon. His face is rather baby like with big brown eyes, and not sure yet what I wil do with his hair. I plan to try a few idears to stylize him, so feedback from you will be great, this is not something I normally do. I plan to make him with good topology for rigging, and facial morphs if I get time. He will have some accessories, some clothes, and some facial makeup. Reference: Iv also created a photo board with some references I collected off the net, this helps keep me in line of my ideas. I added text to each photo to draw my attention to what I liked about each picture. Iv done some pencil sketches which iv scanned into Photoshop and applied Photocopy filter on to get deeper lines. I will use this as a reference to model off.
-
Cool work, looks solid work. I hope to make a start on mine today. Dan
-
Thanks Vozzz. Im using a KVM Switch to get access to both computers now, but the remote desktop sounds better. Iv now got Vray DR setup, but the Tream render is not working. Getting "Bonjore is found, but not running or blocked" on the client machine. I add the Ip address manualy on the main machine but get a error stating it cant run on port 0, use Bonjor. Dan
-
Displacement dose not go into the blend material, but is applied before the blend material on the geometry. The Fast SSS2 has the option for bump so no need to add another, but I guess you could try it. When I make the bump its for very fine details, and I use a 32 bit displacement with most of the skin details in it. If the geometry is high enough poly count then skip the displacement, and go with just a normal map. For very low polygon objects I do not bake the high skin details into the displacement map, just the deformation, and keep the high details just for the normal map. The quality of the maps will determind how good the skin looks, as the colour along with the correct spec and bump detail all contribute, and if one is lacking it looks awfull. Bump and spec are the ones than will make it look bad if wrong. Dan
-
Hi all. I have a two computers and wish to use both for rendering both for C4D own native renderer and Vray. Now im going to ask the obvious question which I can t seem to find a answer to, and am asking by means of a scenario. Two computers, both have Windows 7 or 10 on, each normaly have their own keyboard, mouse and monitor. If your using a computer to just assist in rendering of course you cant have each computer in a render farm have its own keyboard, mouse and monitor, so how do you set up a computer so you never have to require a keyboard, mouse and monitor? I can only think of one way, and thats to some how have the render server software start up automatically, but even still how do you monitor, control, or check for problems? I assume there is a bare bones method of setting up a computer just for rendering in a farm, in the old Win XP days I remember putting software into a startup folder to automate the start up of software. Second scenario is Computer A is normally my main working pc in which I initiate the render from, Computer B is my assisting computer, Computer C is my laptop which is not connected via a physical Ethenet lead, Can I send a job to the other two computers A and B via wifi? Thanks, Dan
-
Ok back to Skin. Here is a quick overview on the Vray4C4D skin options. This video is by no way a final quality that I would publish normally, but its clear enough to get across the 3 options.
-
Wahey!, everything went well putting the motherboard back in, and everything loaded as it was before. I was half expenting some issues, more so trying to get the motherboard in with the water cooling, and cables in the way. Good job I have a big case.
-
Hi. I wont be able to share the full model, but can the file for the shader set up. Even better, I can do a video for you on what iv learnt so far with Skin shading within Vray. Your right, there is so little out there, I had searched and found nothing, so I had to learn the hard way "Trial and error", thankfully, my past experience with Modo has helped me out here, but certainly not perfected it as id like just yet. For skin I do not use the Advanced material, I use the Fast SSS2, or Skin material, and now even better the Alsurface which is so simple to set up. The SSS2 is best used with the Blend Material with separate Spec, Reflection. I just got my motherboard back today, much sooner than I had expected, so Il try to get the file to you later on as its on the HD that the new Motherboard attaches to. In the mean time on my Temp PC il do you a video which should help clear some bits up. Dan.
-
Realy nice, I can see in a short time your be producing some high end work. Keep it up. Dan