Rectro
-
Posts
3,798 -
Joined
-
Days Won
102
Content Type
Profiles
Blogs
Forums
Gallery
Pipeline Tools
3D Wiki
Plugin List
Store
Downloads
Everything posted by Rectro
-
Your Crazy! What ever they add, Im more than happy to be paying for it because Pixologic has just gave more and more, and now have given us super cool new tools for free, again, never paid for a upgrade ever. Dan
-
I think MAXON are missing this one, and should show some loyalty to their old customers offering them a much better deal on a crossgrade. I know a 3D artist who actually recommended C4D to me years ago, he has stayed on v10, got the extra moduals, and still uses it to this day, he is happy for what he is doing. It sounds like you got Blender down which is cool, its always good to have other options. I started on the Amiga 500, 1200, but for 2d and for music production, still got it stored away. Dan
-
Anyone who has r15 is no better off than a owner of other major brands for cross grade discount which I think is very, very wrong, they have missed that one as I think as there are allot of old users who are pushed out of the upgrade scheme . If someone wishes to move out the upgrade loop in hope that they will one day return, a studio user would have to wait at least 6 years to make it worth while because to cross grade is £2,940 inc vat where as a MSA is £540 per year inc vat which also includes cinevercity. Not even 5 years of a MSA would pay for a cross grade. In reality at this time only r12 users and older would get a deal out of it, this is a area MAXON needs to look at. I have other software thats I count on for C4D weaker areas, and there is only so long I will keep paying a MSA until I see my other software being used much less. I cant see Vray being replaced by Pro renderer too soon, or Unfold3D for its Uv tools, or Zbrush for its sculpting, but I do hold hope that Bodypaint may exceed Zbrush in other ways that it lacks, Painting. C4D cloth will not replace Marvelous Designer, and Its Modeling tools wont replace MODOs, but if it comes close in some of these areas in that for some projects I can say to myself, "I can to it in C4D and get the same results in a close time frame" then my MSA is worth it. I dont expect C4D to ever be as great as my separate collectively expensive software alternitives, but it needs to come much closer to warrant over a 3k piece of software. I will be a harder customer to please as I dont use just C4D alone, this is why I need to see some serious speed increases, refined current tools, and advancements in its Modelling methods, these are things that everyone benefits from, and hope some of these things are given attention in r19. Dan
-
The character tools in Houdini do look awesome, and should I ever move from C4D that would be the direction for me. The main potential I see is in its Biharmonic capturing for its weighting, id like to see at least heat weighting for C4D in which Visible should in theory do the trick but is not producing anything like in MODO, and certainly not close to what Houdini has. Invisible rigs for deformation looks nice for fast deformation, again MODO has a simplified pose method which C4D could do with. The muscles in Houdini is awesome, C4D system just dont allow the muscle shaping that I need, I think in Houdini they call it Franking muscles they look like metaballs merging groups of muscles into new forms. While id like to get further immersed into more technology, the truth is I dont actually need some of it right now, but want it, and I always do well to remind myself the difference between Need, and Want, but in either case Im paying for what I consider core essential fixes, and upgrades, and feel modeling, Uv, multi threaded speed enhancements is just that. I suppose its the case that a road map would be nice to see so I can peer into the future and see they do actually plan to update their character tools with more flexible intuitive technologies. Until I actually need these additional cool features Im going to invest my time in being better at what I do, and learn things I need to know with what I have at hand. I think C4D has many features almost hidden, or unknown because they haven't show cased some things very well, and would like to see some areas shown rather than watch a 6 year old video highlighting the feature list of a release. The muscle system, NLA just is not shown much of to mention just two. Dan
-
There's absolutely no point waiting for MAXON to deliver and keep paying the M$A. Stop paying the M$A and wait until MAXON deliver the performance upgrades. Learn Houdini in the meantime. That's just the thing, we only get 2 versions behind and the next version we have to purchase so there is no waiting for the performance and upgrades as id be in a position where paying for the last two version and add a msa which is no cheaper for waiting in fact it's way more expensive than paying a yearly msa. If 3 versions behind your be buying a new licence as a cross grade with no additional discount being cross grading from a MAXON product. For me as a Studio user I need to stick with C4d or go a rent out Maya which is not a choice for me let alone learning it. Dan
-
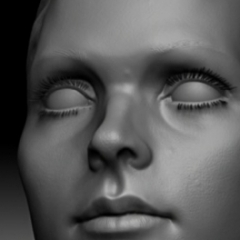
Thanks and yes it's a basic zbrush spray and dot alpha all over. Will be tweaking face today, then start doing proper texturing. Xyz alphas may be my choice along with some hand painted colour maps. There is 3 bump slots so I will do 3 separate layers. I need to do these temp phases to keep me motivated. These may be enough for mu purpose. https://texturing.xyz/collections/human/products/alphaskinface-01 Dan
-
GI Dan
-
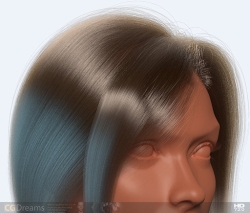
Thanks, appreciate your comments. Because Im working on a likeness, this set up is to give me fast visual feedback, the texture map is hand painted, the final map will have more detail in it. The SSS is using one hand painted diffuse colour map, the ALsurface is doing the rest. Very important is the skin detail, and getting the Reflection amount, and roughness right with the maps. Iv got a kind of formula that seems to work with using the right values, il post my findings. (see image below, may need to click see full size a few times) The secondary Refection has a IOR at 0 so it shows directly at the front of face, the Primary IOR is 1.7 pushing the reflection with a gloss of 0.5 to outer edge. Both Reflections use same amount map, only the Primary has its exposure at 2. Dan Thanks, glad you like it so far. The eyes are two shells. Inner shell which has the flat diffuse colour map. The material is using a blend of diffuse and SSS from the Advanced Vray Material. Outer Shell is reflection, and refraction. Just one key Area light, no Gi, and one Rim light. Dan
-
 Thank you. This is the first time iv actually start to see something realy worthy of showing since using C4D, and think the way its going it should be hitting the target i been aiming for for some time. Dan
 -
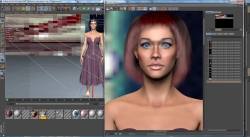
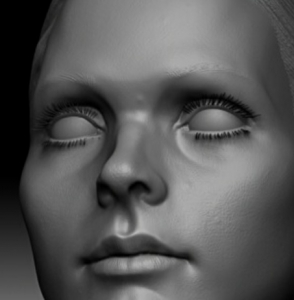
Here I will post images I create while learning C4D basics. Some images may not be complete, or represent final image quality.
-
-
From the album: Learning C4D Tests
-
From the album: Learning C4D Tests
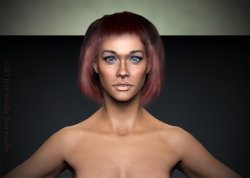
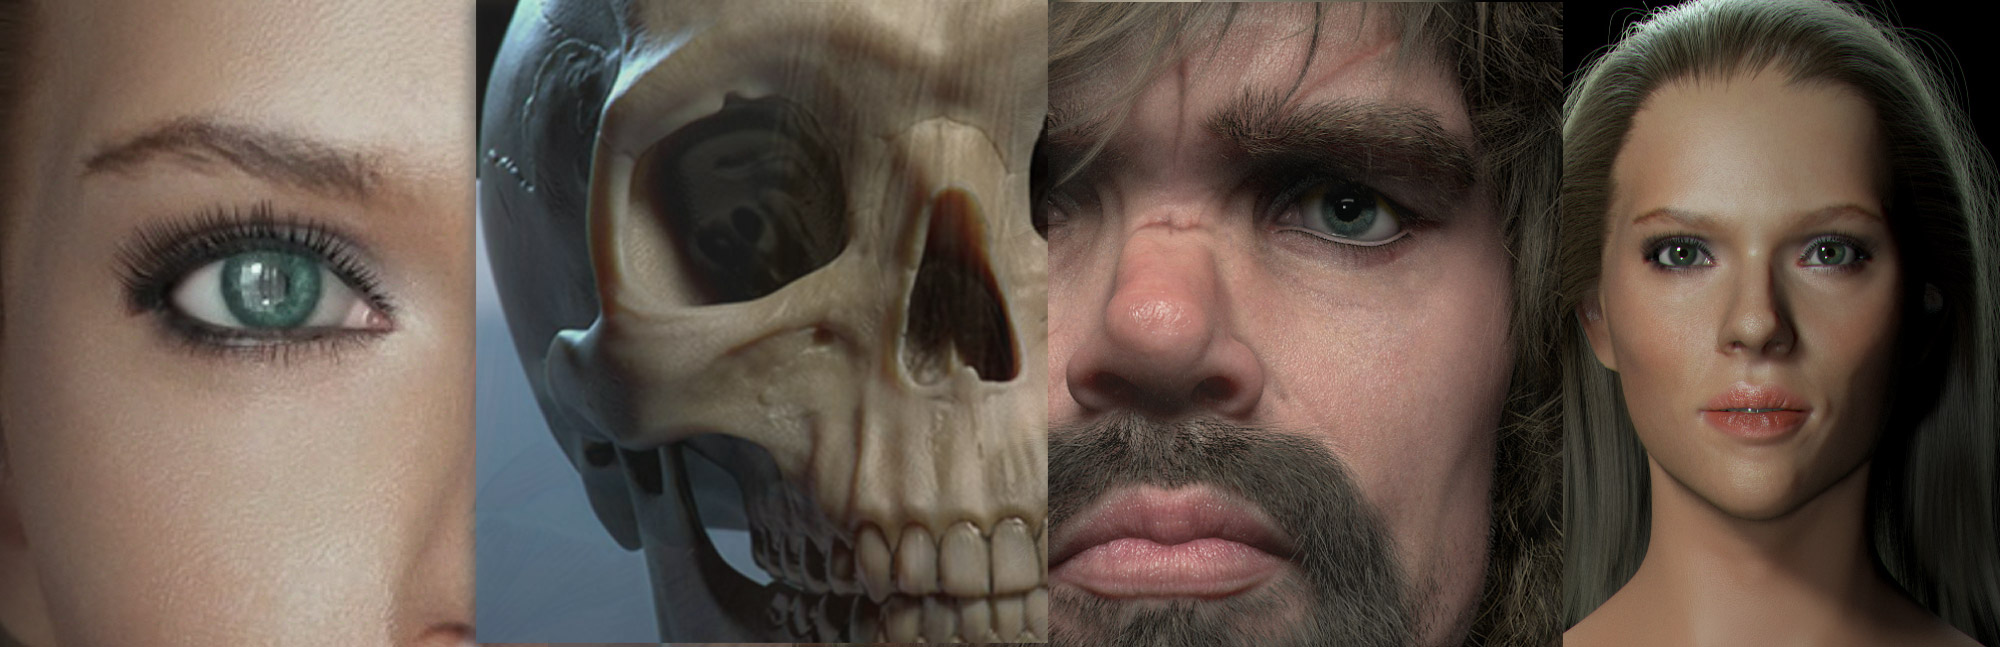
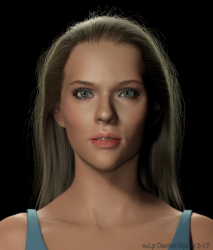
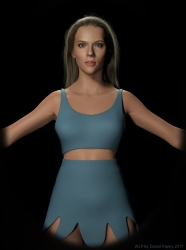
W.I.P low poly female character working towards Scarlot Johanson digital double. Main aim is to get better hand of the whole process using Vray better with C4D. This is a portrate cropped from a full bdy render. Took 25min. Clothes only tempory. Texture maps had painted. Dan -
Started working back on Hair, and Skin in Vray, this time working with Alsurface. She is a low polygon mesh I made a while ago and have been adapting her. This is a W.I.P and rendered the full body in 25min, this is a cropped version. Slight different Hue
-
Having a new render engine integrated into the core of C4D is a massive addition, and will be sure to take up a lot of resources for quite a few releases yet, and as long as other areas haven't been pushed back on their priorities I cant see it being a issue. Looking back in the earlier years MAXON did bring out some huge releases. I think we can only speculate for r19, and hope that R19, will not be what some including me fear, One big feature Pro renderer, and a few little things here n there that that does not target some things that should be prioritised before a new render engine. Your right at the end of the day the final result has to be rendered out, but you got to produce the content first, and part of that production before we render is a proper Uv tools set, better modelling tools with global symmetry, and anything related to content creation. Another to mention is the price difference between the lower to higher end range of C4D, Studio owners need to see the benefit. Iv purchased my MSA a week ago for my Studio licence, I have faith in MAXON that they will pull a decent upgrade, and to be honest there is little else out there other than Maya that can compete. Dan
-
Just to add to what 3DKiwi said, it was the NLA that I had been waiting for in MODO which is why I had to either go Maya route or C4D. C4D Motion system works quite well, and for its other animation benefits it makes C4D the best second contender to Maya for character work, only you can own your software. Between C4D, MODO, and Zbrush you have a very powerfull pipeline, they all play well, and the ACS Kit for MODO plays much better with mocap than C4D character tool does, but this can all be transferred from MODO to C4D via FBX, then into C4D NLA. Dan
-
Ohh right, I must be getting my dates mixed up, Sigggraph is a good time all round, am also looking forward to see what a few other peices of software will bring including Marvellous Designer 7. Dan
-
Yea your right, just speculation, we will see in due course. I didnt think Siggraph was until Sep, right at the time when its due for release? Dan
-
Id be quite happy if I knew MAXON had this in their road map all the while they bring the Modelling and Uv tools up to MODO standards. Id rather drop MODO all together but as things stand there is no chance of that. Id like to see at least one area dealt with for my $650 investment. Modeling, Uvs, Retopology, Better Mocap support with character tool ik/fk blending. Unfortunately while I really like C4D overal, MAXON have me by my nuts when it comes to their MSA as there is zero financial gain by missing a upgrade. They need to start being more open, and address the fact that its users want to know what they are investing in, im just starting to get a little un easy as Im not seeing much, or hearing anything that makes me feel r19 is going to offer me anything of interest. There is no other choices as far as I am concerned, but thats how Im feeling now along with other things that are going on in my life., they need to give me some glimmer of hope. Dan
-
It would be nice to see MAXON kick back at Maya with some updated character animation tools, view port 2.0 like performance, and visuals. Updated hair system, and easier to setup Mocap and facial rigging with a skin deformer. A updated muscle system with self collision. Dare I say automated JCM for Correctional deformation. For Pro render to compete with Arnold its got a way to go, it may be faster but there is little out there that can compare to its SSS methods, only Vray because it has the ALsurface now. If MAXON can get the hair to render as fast in pro renderer with self shadows, and look better than the Standard renderer id be impressed, but to get my attention id need to see a good skin shader, or implement ALSurface, then its got my attention. There are many render engines out there that can produce nice shiny cars. Dan
-
Nice. Can you give me a break down on the material, lighting, and scene setup please? Id like to know what render times you got and what system specs you have. Do you have a higher res version, say 3k or higher? Thanks. Dan
-
Nope, apart from with MODO the $200 per year permanent penalty rise for coming out a life long maintenance subscription, and being forced into a years subscription just to sell your licence as you can only sell up to date versions only. Fortunately at the moment Im not forced into any maintenance at all If I wish to stay with my current version, and when I do iv jumped from 902 for what ever version it is when I start my subscription, so thats a huge bonus if I just wanted one more huge upgrade. Dan
-
Yea what I got from that thread was r19 is getting the pro render but its not fully production ready as in its feature set, this kind of means that we dont actually know how long it will take to mature to a full production renderer like we have in 3rd party renderers. Looking at MAXON pricing again, looks like I have no choice to have a MSA in either case as it will cost me 20% more to upgrade two versions, one version of which I would have had no use of what so ever during that missed year, yet Il pay 20% more for missing one year, wait another version then Im totaly out of the upgrade path which leaves me no better off than to use a side grade offer. Dan
-
I am too happier with C4D than MODO in many areas, but I too am in the same dilemma because the areas where MODO shines, are significant, and for them few areas Im having to keep MODO. Im still on 902, but have not seen any reason to upgrade MODO. What makes things even harder now is the position in which The Founder has left me in. Im an existing perpetual user so I get my maintenance at $399, but Im forced to stay on that forever or my penalty will be iv lost that discount and pay $200 more forever. I may well just get the $399 to get the latest version that adds value to me, then leave it there, and get back onto a $599 subscription every 3 years or so, but Im thinking that there could be some clause in that. If you want some serious Uv tools that excell MODO then Unfold3d is the way, I own MODO and purchased Unfold3d because its that much better. Dan
-
Glad to hear its more stable. To be fair 902,sp3 seems quite stable. While I was tempted to sell my MODO licence when they started their subscription scheme, MODO still has so much to offer than C4D is just way to far behind on, so I hope to upgrade MODO when I see some features that pop out, or I can be at a point Im prepared to make the most of my $399 offer and not opt out. I hope r19 dont pan out as you speculate, otherwise Im going to have to re think my options for future upgrades. Dan
-
Id rather MAXON release Bodypaint when its done, iv had years of half baked features with other software, its much worse than not having it at all. As long as they honor r18 users that when its ready all r18 users and above get the free update, then Im good with that. Stability and commercially ready features out the box holds allot of value to me. Dan