-
Posts
17,957 -
Joined
-
Days Won
733
Content Type
Profiles
Blogs
Forums
Gallery
Pipeline Tools
3D Wiki
Plugin List
Store
Downloads
Everything posted by Cerbera
-
I suspect OP is looking at just the vertex colors, not the map...I think they were a thing back in R20... CBR
-
I have an idea. It could be as simple as your material being low res'd for the viewport ? If you pop to the material, and in Viewport tab of that, change it from default to no scaling, we get this... CBR
-
Dear oh dear... Is that a clickbait photoshop arse job ?! Kinda links back to what Frodo was saying about how much traction that sort of thumbnail (and indeed that sort of arse !) might achieve... CBR
-
Welcome to the Core 🙂 We're probably going to need a bit more information than that, and probably the scene file including the model AND the texture to be able to work out what we have to change here. Trouble is we don't know anything about Meshlab photogrammetry, and what it outputs, and how it intends you to use that data in a DCC. So you need to tell us that ideally or at least point us to the tutorial that showed you how to use it ! I presume Meshlab uses UV mapping to nail the texture to the mesh (?), so first thing to check is whether is the UV map comes into Cinema correctly. Please show us that map. If that is OK, and this IS how the model works, then you should be able to create a new standard material, load the jpg into the color channel, apply it to the model, and the mode should automatically be set to UV mapping, and in theory should be correct. If that isn't working we need to know what you did differently, and we need to see the files you are working with, and how Meshlab expects you to work with their model. CBR
-
And with some tweakings to your materials and lights we can get pretty decent result, surprisingly quickly in Standard Render ! So, basically I added a sky with a high contrast HDRI to get nice reflections on the glass, and then altered the stage geometry so it let as much of that sky light through as possible, so more of the glass reflects interestingly. Light 1 became an Area down-light positioned above the object, Light 2 the same, but pointing in from the right, both with area shadows, and Light 3 was left Omni and no shadow and parked directly behind the bottle to backlight the liquid a bit. All lights got their falloffs activated and were set to physically accurate etc. In the materials your blue glass was letting stuff down because of what you were doing with Fresnel (too similar to the liquid color, so bled into it), so replaced that with standard glass, which you can tint blue later with absorption ! Liquid needed more transparency (<90%) and absorption depth got lowered to something more like a quarter of the width of the liquid... And with all that done, things are looking pretty reasonable for a renderer that is approaching 15 years old ! By the time Anti-aliasing is turned up to best / 1 x 1 / 4 x 4 we can get these renders done in about 26 seconds. bouteille de bière 2 exo 3 p26 Kobo CBR Fix.c4d CBR
-
Here's what those splines should look like... (liquid spline in blue) I know your question is about materials mainly, but we need to fix this modelling stuff first so that light rays can move properly through the objects. CBR
-
OK, a number of issues need solving there. 1. Liquid spline has thickness, which it shouldn't - liquid isn't hollow on the inside. Also this spline layout is illegal featuring as it does non manifold / intersecting points. 2. This bottle is not a solid object in that it has a hole in the top, and the cap shouldn't be included in the bottle lathe - that should be separate object. 3. Liquid Is exactly coincident with the external wall of the bottle, which is also incorrect. If you using Standard or Physical Render the liquid should only just slightly overlap the INNER surface of the glass. Also your bottle is sitting half buried in the floor for some reason - you will want to place that bottle exactly on the floor ! Lastly, the surface of liquid in a container is not flat - it has a 'meniscus', which is a slight rise of the liquid where it meets the glass. CBR
-
Excellent - glad you found it helpful, and thanks for the tip ! 🙂 CBR
-
He's definitely very very good, no doubt about that, but I'm not sure anything about him 'changes everything' !!! And I find myself suspicious of some of his view counts - I can't imagine there are 26 million people who want to know how to build a robot arm rig, even in the substantially wider audience / userbase that free software generally attracts. Something seems off there. Our own rock stars - people like Chris Schmidt or Noseman for example are not getting anything like that viewership and their skill and presentation style is no less brilliant, so I wonder what the reason is why he is getting 1000 times more views than even very experienced and long term tutorial people.... CBR
-
You're in luck - I did get time 🙂 Might be a while processing in HD, but keep refreshing, and it'll get there soon. Using the same principals, the dot on your 'I' could look like this... CBR
-
I only used Symmetry for the lower half of the shape, and needn't have done even that to be honest - 2 discs also a fine way to start if you have reference image or spline to follow. If I get time tonight I will make you a step-by step, but am quite busy with client stuff, so may not. Ideally you will want to watch some Youtube tutorials that cover the basic modelling tools like poly pen, loop cut, line cut, inset, dissolve, connect, extrude (the modelling command, not the object), bevel etc etc, and having watched a few of those it will become obvious what you need to do to match my topology. CBR
-
Modelling is my main thing, so you'd think I would use Max, who's modelling toolset was once thought of as unrivalled. And indeed I started there. And yet I note that I use Cinema now and would not go back, for a multitude of reasons... I suspect you will find many, many more things that annoy you in Max than do in Cinema, if you move there. The grass may 'look' greener on the other side, and it is, as far as mtls are concerned, but you may find you don't like the taste of the rest of it 😉 'Try before buy' would be my advice, not that you can ever properly 'own' that software of course... CBR
-
Yes ! That's very close to a decent mesh. Solid B grade there, depending on the final use and circumstances. But not perfect. For example, if this is in an SDS workflow that is too many polys, and if it isn't, then it's not enough because you'll still see segmentation in the render if the camera is very close to it. Also look at the groove / dipped area on the base of the W. if we are needing accuracy to reference font that should be a single edge there like in my version so the groove is razor sharp. You are correct that quads are vitally important to SDS modelling, and indeed you will notice that my model is all the quads, AND has that single edge in the dip there, AND is made of not one poly more or less than we need to describe those curves under subdivision, and has a very logical and neat polygon flow, which are the sort of differences that make it A grade 🙂 CBR
-
Manual topology FTW 😉 You didn't upload your file, so I just did it really roughly with no orthographic reference, but the edge flow in a properly modelled letter would look something like this... I started with a disc object (with inner radius to get a ring) used symmetry initially, and Subdivision Surface to get resolution-less smooth rounding whilst only needing very few base polys. Of course it does take (fractionally) longer to make it this way, but once you have, you have the most flexible and eminently useful model, that will deform properly for use on curved surfaces (unlike splines in extrudes for example), and will work in any program the mesh gets exported to. This is overkill for a lot of renders that just need decent looking planar text, where topology doesn't matter so much. And sometimes, where absolute mathematical accuracy to fonts is required then the SDS approach is sometimes not accurate enough. The 'trick', if there is one, is knowing when to use any of the various approaches, which is something that comes from advice and experience. The modelling journey to excellence is a long and winding one, and takes years to perfect, but it's a very rewarding road to be on 🙂 CBR
-
Decent topology comes from actual proper modelling, rather than by putting splines in generators like Extrude, which is a nice easy cheat for people who don't yet know how to model ! But autogenerated topology is never the best, although sometimes it is good enough, depending on circumstances. In your letter you are using something called Ngon caps, which just puts one big polygon on the cap surfaces. There are a lot of other options in that list ! The new and the lazy tend to stick with those ngons, or regular grid caps, or delaunay type, but people that genuinely need proper topology (for example that will work with Subdivision Surfaces etc) don't use splines in extrudes to start things off - instead we would use the splines merely as a visual reference, and build the letter using poly pen, or any of the other poly modelling tools. CBR
-
Excellent - glad you found some value in my ongoing efforts. Happy to book a short skype or zoom session with you to discuss all the terms you haven't understood so far ! But actually I think Mrittman's eradication of the pesky frame update problem provides a much more stable base going forward than what I had going on, so I am led to think we should probably continue on from his version of the file, and buy him a round of beer or 2 along the way for cracking this vital part of the problem ! I wasn't even LOOKING at the piston setup for problems being caused in the springs !! 🙂 Anyway, hit me up in the DMs about when you'd like to arrange discussions if you still think they would be of value ! CBR
-
Bezo DID answer the question. He pointed out where the Regular Grid option was AND explained that you have to choose a suitable spline interpolation in the elements feeding the Text object in order to minimise the edge clustering. How does that not answer the question ?! 🙂 CBR
-
Care to elaborate on that ?! 🙂 CBR
-
Yes, we talked about how suitable this topic was for our forum, and whilst we think that the Core should be something of a respite from the troubles of the world at large, we let this one go because it is focused on how the situation affects this community. If we can keep the discussions centred mainly around that we can avoiding getting the politics out and keep our blissful 3D-land largely conflict-free... CBR
-
Lols - that's nice of you dude - thank you, and glad it helped ! 🙂 If you want really sexy advanced rock textures, check out New Plastic if you don't already know him... CBR
-
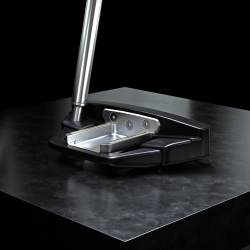
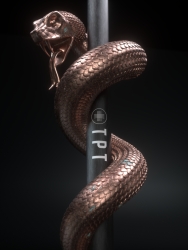
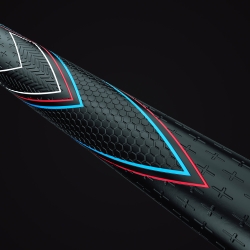
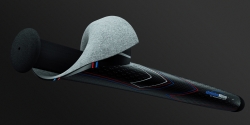
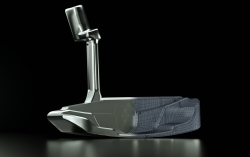
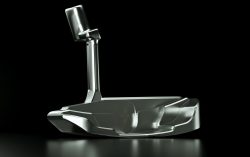
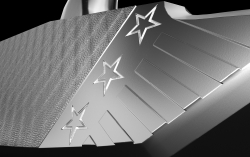
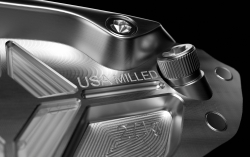
Recently worked with a really great creative agency with several golf clients - models 100% polygonal, Renders by Kane Cochran (Octane)
-
In my ongoing quest to model every prototype golf club in the universe, here's yet another one ! SDS, all the quads for this one... ...and then over to my buddy KC for prettification in Octane... CBR
-
I'd probably make sure there was black value in metalness, but apart from that, all fine. How does it look in the render ? CBR


