Leaderboard
Popular Content
Showing content with the highest reputation on 07/31/2022 in all areas
-
So in the development of my on-going Death Star Bay, I need a laser cannon. As modeling the hanger bay and now the exterior of the bay was already pretty daunting (and as I do suffer from the dreaded "PWFS - or Personal WIP Fatigue Syndrome", I decided to see if there was not already a model out there of a laser cannon I could purchase. Lo and behold I found one on Turbosquid! And it was ONLY $2.80 USD. Such a deal! Well...until I loaded the FBX file into C4D WARNING: The following photos are disturbing in nature given their graphic depiction of corrupt geometry. Viewer discretion is advised. At first, not too bad but think of it like purchasing a used 1967 Corvette where the body looks pretty good for its age and you feel you may have gotten a great deal. That is until you look under the hood: Honestly, you have to put in work to corrupt geometry this bad. This can't be a conversion issue because it looks like random cuts were made all across the model. The model just looks like it was abused by the author. US DSS (Department of Substandard Surfacing) officials have been notified. Close to 5000 polygons for such simple primitive shapes too. Overall, there were over 175,000 polygons in this gun alone. As there were going to be more than one cannon in the Deathstar WIP (which alone would be a high poly model to begin with) something needed to be done. So, I got to work. And honestly, it was a joy. It just became addictive to clean up such bad geometry and simplifying the model at the same time but without losing important details. Maybe I have an OCD when it comes to triangles. Not sure but I found the whole thing strangely therapeutic. Getting there.....more to do: I have already added some Xpresso and rigging controls to control the guns and turrets. Then I will work on the controls to make the guns recoil and a green volumetric muzzle flash appear. So this $2.80 USD model is providing a wealth of entertainment. Dave P.S. Okay Cerbera. The frightening images are over now. It is safe to go back to moderating!!!! 😁3 points
-
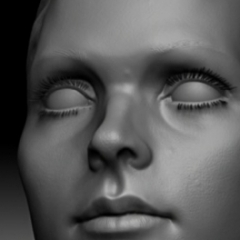
Hello guys. The long awaited Random Walk Sub surface scattering has now been added which for some will be a huge addition to Redshift. A move from point based to Ray traced SSS was a move in the right direction but the new standard for SSS has shifted for some years with other DCC packages. Arnold known for its quality skin renders using the AL Surface was ahead in the game of realistic portrait 3D Art. Arnold moved to the new method Random Walk which is highly accurate and helped produce some stunning renders using this method of SSS. Redshift own methods for SSS just didn't hit the mark, especially for realistic skin rendering. This has now changed with the inclusion of Random Walk in which further improvements are on the cars I'm sure. The big deal for Skin and high frequency detail models is that SSS needs to offer the ability to produce back scattering for thinner objects, frontal scattering for the soft look of skin while being able to retain high frequency detail often lost when SSS is applied. In addition to this bleeding was often a problem in areas such as the lips, eye lids, and nasal creases. The difference with Random Walk is significant. Alsurface render within Vray. 6+ hours Redshift Raytraced render (Principled Hair shader) Redshift Random Walk (Principled Hair shader) 2080 ti 1hr 13m3 points
-
Funnily enough I had almost exactly the same experience when someone hired me to remodel the Batman car for an Ad recently. Found a perfect base for $2 on TS, and then spent all the budget updating, improving and re-meshing it. It was similarly upsetting in its original state 🙂 But, in the absence of any references showing me actual measurements, and the quick turnaround they wanted it was very helpful to have it there to improve ! Even a model that is properly awful, and needs redoing from scratch can still be useful if it shows us the correct proportions / silhouettes or can be used as a base for easy retopology... CBR3 points
-
You should have posted them sooner. Really nice work!!! Great imagination. Dave1 point
-
Ha, let me get a super old design of mine out of the garage. This must be from the Cinema R10 era, when I bought my first license and began to dabble with 3D for realz 😄 So, please be gentle with critics 😄 The design is about a carrier spacecraft - more or less, just a "strap-on-engine" to standardized modular containers. In this case, for people 🙂 I was interested to explore a design that combines extremes... a fat block of unwieldy cargo, but combined with some delicate elements reminding of dragonflies or seagulls. Some topics mentioned in this thread can be recognized as well... areas of high detail vs low detail, lights for scale, core/shell etc. Random additional infos: - The little yellow globe is the cockpit with 270°-View. There are even little people inside, but I don't have a close-up - I don't think I've posted this anywhere yet, so these are images waiting decades for their premiere😄 - Standard Renderer -- those took ages on some brutal VAIO-Laptop. That thing was so loud XD1 point
-
I would agree that the model does provide the correct proportions for replacing with your own model. I do spend a lot of time researching the internet for photo references. Finding orthographic views of completed models is rare enough but you will never find orthographic views of each of the major components of those same models in their proper positions (hmmmm.....now wouldn't that be a neat product and pretty cheap to produce if you already had the model). So even a crappy model at a really cheap price is the next best thing. When you think about it, it is the 3D equivalent to painting by numbers? Plus, if the modelling had been perfect, I might not have been motivated enough to go in and break it down for rigging and animation. But if you are breaking it down already piece by piece to essentially replace everything, then it provides that opportunity to get the axis correct for the animation controls you want to put into it. Dave If I had your skills, then I would have felt the same. And you would have done an amazing job!!! Dave1 point
-
Lovely to see these tests Dan - keep up the good work 🙂 CBR1 point
-
I'm really glad to see you sharing these and posting your initial thoughts. I know you've been waiting on this for a very long time, and I hope the new RW meets your needs. The results above look good to my eyes, and a massive improvement on the pre-RW Redshift version.1 point
-
You don't seem to be acknowledging the way generators work in Cinema. The Extrude Object ONLY works with splines as its children - not splines in sweeps or other generators - JUST splines. You have a complex network of polygon objects and other generators under the extrude in that scene, so you are simply not giving it what it needs to work ! This what a valid extrude hierarchy looks like... which will give this result... (make sure you tick hierarchical in Extrude so it reads all the child objects) Now, if you want sweeps of those splines as well that's fine, but you should use copies or instances of the splines to make those rather than trying to lump them all into the same hierarchy. Any thickness you may be trying to add with Cloth SDS should be ABOVE the Extrude object in the OM, and never a child of it. CBR1 point
-
Version 1.6
42 downloads
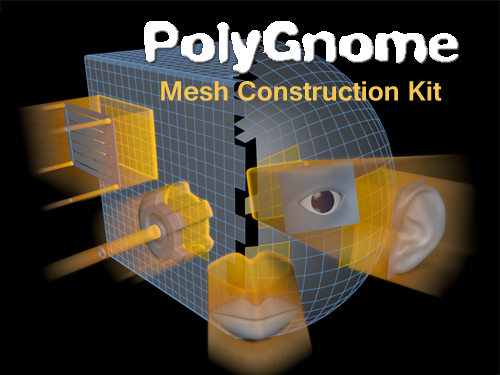
PolyGnome is a Cinema4D plugin to provide a quick way of inserting greebles and mesh-parts into a mesh object. The version available here only supports R20 (for now), and is provided as is. Documentation included. Some mesh-parts are provided as a default library. Users can create their own libraries. This plugin can work together with "PolyDup", another modeling plugin available here at the Core4D forums. Original thread:Free1 point


