All Activity
- Past hour
-
Maxon Unveils Game-Changing Cinema 4D 2025 Update: Enhanced Modeling, Texturing, and Scene Nodes March 31, 2025 – Los Angeles, CA – Maxon has officially announced the highly anticipated Cinema 4D 2025.1.4 update, promising groundbreaking new features that will redefine the 3D animation and motion graphics industry. This latest iteration of Cinema 4D introduces significant improvements to modeling, texturing, Scene Nodes, and animation workflows, ensuring a more seamless experience for artists. Official Statement from Maxon’s CEO “Cinema 4D 2025.1.4 is not just an update—it’s a revolution. We’ve listened to our users and implemented features that streamline workflows, accelerate creativity, and push the boundaries of what’s possible in 3D design. Our latest enhancements to modeling, texturing, and Scene Nodes will empower artists like never before.” — David McGavran, CEO of Maxon Key Features of Cinema 4D 2025.1.4: 🔹 Enhanced Parametric Modeling Tools – New and improved parametric objects offer greater control, including advanced spline editing and interactive beveling. 🔹 Advanced Scene Nodes 2.0 – A major update to Scene Nodes introduces a more intuitive interface, expanded procedural modeling options, and real-time performance boosts. 🔹 Improved UV Packing and Unwrapping – A completely reworked UV workflow includes automated packing, distortion minimization, and island grouping for better texturing efficiency. 🔹 Neural Render Engine (NRE) – Cinema 4D now features an AI-powered render engine that reduces render times by up to 90% while maintaining photorealistic quality. 🔹 Real-Time Path Tracing – A fully integrated real-time path tracer allows users to see near-final renders directly in the viewport. 🔹 Auto-Rigging AI – Character animation just got easier with an intelligent rigging system that auto-detects joints and optimizes weights instantly. 🔹 HoloC4D VR Integration – For the first time, users can sculpt, animate, and render in a fully immersive VR environment. 🔹 Redshift Cloud Render – A new cloud-based rendering system allows users to offload heavy render jobs and access high-performance GPU farms directly from Cinema 4D. 🔹 Deepfake MoGraph Generator – A new AI-assisted tool that generates realistic face animations from a single image input. 🔹 AI-Assisted Material Suggestion – The new AI-driven material engine suggests realistic textures and shader settings based on your scene context. Spline SDF Smooh blending of 2D splines. Outline Capsule Unlimited number of oulines with the new Outline Node and capsule Chamferer The new Chamferer generator brings non-destructive, parametric editing on individual spline control points Field Distribution Cloner Mode Fields can now be used to place children instances by mapping the hierarchy of the children to the intensity of the field. Release Date and Availability Cinema 4D 2025.1.4 will roll out as a free update for all Maxon One subscribers starting April 1, 2025. Perpetual license holders will have the option to upgrade at a discounted rate. For more details, visit www.maxon.net. Exclusive Interview with Maxon’s CEO, David McGavran Q: What was the main focus for Cinema 4D 2025.1.4? David McGavran: “Our primary goal was to refine and enhance the tools that artists use daily. We wanted to create a more intuitive and efficient experience, whether it's through procedural modeling, advanced texturing, or improved rendering. The new Scene Nodes 2.0 is a huge leap forward, allowing artists to build complex structures with ease.” Q: How does this update compare to previous ones? David McGavran: “While every update brings innovations, this one focuses on practical enhancements that improve workflow speed and creative flexibility. We've also made significant improvements to UV workflows, Boolean modeling, and dynamic simulations based on user feedback.” Q: Can you give us a sneak peek into the future of Cinema 4D? David McGavran: “Absolutely. We are already developing features for Cinema 4D 2026 that will push procedural modeling even further. Expect deeper Redshift integration, better scene organization tools, and an overhaul of particle simulations. We're also exploring more real-time collaboration features to make remote workflows even smoother.” The new interface of C4D 2026:
- Today
-
 Davidave joined the community
 -
 nigob joined the community
 -
 yocivaw joined the community
 -
 srtand joined the community
 -
 zenproducts joined the community
 - Yesterday
-
 huaiko joined the community
 -
 maliciouscod joined the community
 - Last week
-
 amancue joined the community
 -
 chromefull joined the community
 -
 omegax joined the community
 -
For animation I would use Mospline since it has a lot of animation posibilities/parameters.
-
Well.... I've asked (and still asking) for a Helix 2.0 with myltiple modes like Logarithmic. Archimedian and Double but primitives won't ever change in fear of compatibility break with older projects. But you could try it just on a Symmetry Object ...
-
Hi all How can I do a double spiral? It should animate from zero central point and both ends should grow at same time thx
-
 But Alembic is supposed to support re-timing... simple animation offset. What kind of re-timimg do you want ?
 -
 I have an x-particles simulation that's been cached and re-timed. I need an alembic export of this so that I can send it to a render farm that doesn't support X-particles. I can get an alembic export of the UNcached simulation, using thinking particles, but I'm not able to then bring that back into c4d and re-time it, because it doesn't allow for interpolation. If I try to cache my simulation, the thinking partilces just don't seem to recognize it. Is there another way to export an x-particles simulation? Or get the thinking particles workflow to recognize the cached particles? Thanks for any assistance!
 -

Update on various DCCs and CG Technologies - (January/February/March 2025)
Jeff H1 replied to HappyPolygon's topic in News
Autodesk released 2026 versions of their apps -
Dash The full version of Dash is intended to let artists to build complex environments without having to navigate the Unreal Editor’s interface, working primarily in fullscreen mode in the viewport. It provides readymade behaviors – accessible by typing natural-language search terms into a floating prompt bar – for common scene-building tasks like ‘create terrain’ and ‘apply water’, plus scattering tools for dressing environments. As well as game development, Dash can be used for offline work: for example to create animations, visual effects projects or architectural visualizations in Unreal Engine. You can read more about its features in this story on Dash 1.9, the current release. Polygonflow has now updated the trial version of Dash so that artists can use part of its toolset for free indefinitely. You can now use all of the features for free for 14 days, after which point you have access to the content browser, but not other functionality like object scattering, physics or material blending. The change makes Dash a more fully featured free alternative to Unreal Engine 5’s native Content Browser, with support for asset tagging, and fuzzy, semantic and Boolean search. You can read about its functionality – much of which was added in Dash 1.9, and which makes it quicker to search large collections of UE5 assets – in the online release notes. Dash also integrates with Fab, Epic Games’ online marketplace, and comes with libraries of free IES lights and CC0 assets from Poly Haven. Dash is compatible with Unreal Engine 5+ on Windows 10+ only. Free licenses work in demo mode for 14 days, providing access to the full toolset; then in free mode indefinitely, providing access to the Conent Browser and AI assistant only. https://www.polygonflow.io/try-dash CharMorph CharMorph is a successor to previous open-source Blender character generator MB-Lab – itself a community fork of the popular Manuel Bastioni Lab. Both have now been discontinued: Manuel Bastioni Lab in 2018, and MB-Lab last year, with development work moving on to CharMorph following the release of MB-Lab 1.8.1. According to the development team, CharMorph reimplements “most of MB-Lab’s features”, and uses the same base meshes and character morphs, but does not contain any of MB-Lab’s code. CharMorph makes it possible to create custom 3D characters by starting with one of the base 3D characters included with the software and applying morphs to modify it. The morphs have to be baked destructively before the character is rigged, although it is possible to export them in advance, making it possible to keep iterating on a character design. It is also possible to use CharMorph to modify an existing imported 3D character, including those with different topology. Exported characters can be rendered with Eevee, Blender’s real-time renderer, or Cycles, its main production renderer: you can find more details in the online documentation. Although it lacks some of the features from MB-Lab, such as auto-modeling, CharMorph has a number of advantages over its predecessor, listed on the project’s GitHub page. Key benefits include support for Rigify, Blender’s modular character rig creation system, including for facial rigs, and real-time fitting of clothing. It is also possible to set skin and eye color directly, and displacement is done at material level rather than using the Displace modifier, making it possible to preview the effect in Eevee. But perhaps most significantly, it is possible to use characters generated with CharMorph in any kind of commercial work, including closed-source games. Whereas the base character from MB-Lab is licensed under an AGPL license, CharMorph has three alternative base characters with Creative Commons licenses: either CC-BY attribution licenses, or in the case of the Vitruvian character added in the latest update, a full CC0 license. In a story on BlenderNation, the developers comment that they aim to provide character models that can compete with those from closed-source solutions like Character Creator or Daz Studio, “achieving the level of quality seen in blockbuster movies and next-gen video games” As well as the Vitruvian character, CharMorph 0.4 features a number of other improvements, including the option to download characters or update the add-on directly within Blender. The development team says that it now plans to extend the software beyond humanoid characters, making it possible to create animals and other creatures. CharMorph is compatible with Blender 4.4. It’s a free download. The software is open-source: the source code is available under a GPLv3 license. The individual base characters are available under a range of licenses: the new Vitruvian character is CC0. https://blendercharacterproject.org/ https://github.com/Upliner/CharMorph Yeti 5.2 The update adds two new nodes for resolving intersection issues: Plume, for resolving feather-feather and feather-geometry intersections, and Resolve, for fiber intersections. Other new features include cross-platform file path mapping, following a similar convention to the Arnold renderer, and a new C++ API for evaluating Yeti graphs. The previous 5.1 updates were primarily bugfix releases, and to add support for the current versions of Maya and the supported renderers. Yeti 5.2 is available for Maya 2024+, running on Windows 10+, and RHEL and Rocky Linux 8.5. Indie licenses – one perpetual node-locked workstation licence and one render licence – are available to artists with revenue under $100,000/year, and cost $329. Studio licenses – one perpetual floating workstation licence, plus five render licences – cost $699. Further packs of five render licences cost $399. https://docs.peregrinelabs.com/release-notes Zen UV 5.0 New features in Zen UV 5.0 include the Zen UV Touch Tool, which makes it possible to perform common operations like moving, scaling, rotating or snapping UV islands more quickly by manipulating them directly in Blender’s UV Editor, using an intuitive-looking gizmo. There is also a new Auto Unwrap operator, which provides a bridge to Ministry of Flat, Quel Solaar’s free standalone Windows-only UV unwrapping tool. Workflow improvements include a new Zen Sync operator, which preserves edge and face selections when switching between working modes. There are also new options for selecting intersecting or stretched faces, new control options in the trimsheet tools, and updates to Zen UV’s native UV unwrapping algorithm. Zen UV 5.0 is compatible with Blender 4.0+. A single-user license costs $39. The update is free to users of version 4.x. https://zenmastersteam.github.io/Zen-UV/latest/changelg/release_note_5.0.0/
-
That is exactly what I thought I was doing wrong but I didn't know how to do it or fix it 🙂 thank you!
-
You can reference into graph as classic object. Geometry port is under "op" group port. To import use ctrl+drag from object manager into graph, that will create a copy of geometry in the graph itself.
-
@DasFrodo You are getting just geometry from the cubes without transforms (matrix), transforms are needed.
-
Hey bezo, thanks for the reply. I don't quite understand what your second approach is. Can you elaborate a bit more please?
-
You may find some example for iteration in the capsule file pit thread. If the link works, it will get you there + to a comment where more links to resources are mentioned. Great place for better understanding of Capsules + Scene Nodes. 🙂
- Earlier
-
Use as child Connect object and put all geometry objects there. Or use objects links input (drag objects in OM which you want use into objects links panel), decompose it and transform geometry with iterations of geometries and matrices to clone onto points node. But I think first solution is more understand-able 🙂
-
Darker background. It's supposed to be space after all.
-
Maybe I'll do it using Xpresso... boole switch on editor and renderer visibility
-
Hi community, long time no see 😄 Due to circumstances (life happens ey?) I will probably be returning to C4D. Just to have a look at the new features I have missed out since R21 (which is a lot) I'm trying to do a bit of Scene Nodes. I have some stuff already working, but I'm currently stuck at iterating through multiple children. I have a very basic setup where I want to clone some spline onto the points of multiple objects that are children of the Nodes Spline. However, the spline only gets cloned onto the first cube. The second one is, as you can see, slightly offset. However, even if I change the order of the cubes nothing changes, so I suspect that I'm missing something to do with transforms / matrices / positions. Unfortunately my google skills either suck at this point or not many people are posting about Scene Nodes on the internet. Any pointers, please 🙂 ? Thank you!
-
@Hrvoje @Donovan K MXN Well... I guess that's one more entry on my suggestions list for future improvements .... I remember people back in R23 when SceneNodes made their first appearance, found a way to import OM objects using some kind of Alembic node ... is there any similar hack ? I have imported a collection of splines from Blender that are impossible to draw-by-hand. In Blender they are parametric but have no idea how to reconstruct them in Scene Nodes so I figured that simple boole of a collection is enough for me for now.... AHA! There's a Classic Object Import ! .... Hmmm... I can't make it have an Output Port... could be a bug ?
-
@HappyPolygon - You can create sub-assets for the Primitive Op & Distribution Op, but there isn't a way for you to construct your own uber-nodes like them. These are special hard-coded nodes that are looking for nodes based on a specific template. You can maybe approximate this by creating a Nodes Mesh/Spline and using a Switch node to switch which graph you output, managing all of the input ports for your different object types will quickly become more trouble than its worth.
-
I think they have trial version too. Simply check it. I have somewhere this plugin since bought it many years ago for my R21 commercial release.
-
You can't reference objects from OM, it needs to be created in the scene nodes context which is, again, experimental, so expect issues 🙂
-
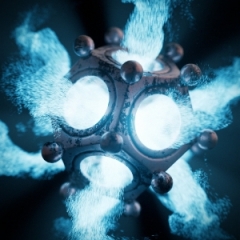
Hey everyone, thanks for the support! This is the final result I got. I think it's decent, but I feel the rendering is lacking. I need to keep the background bright, but as it is, the contrast doesn’t seem right. If you have any rendering tips to improve the overall look of the image, I’d really appreciate it. Just a note: I only have access to the native Cinema 4D render engines. Cheers, Eudes.
-
Seems that plugin. is still available tho site and pricing a bit confusing, seems to start at 60 bucks, think I can live without it at the mo, hoping I may stumble across a slightly newer version of cinema at some point.
-
This is what I get with RMB Should I import a mesh from OM with some other way ? I just drag-n'-dropped it ... (C4D 2025.0.1)
-
Rmb and convert to op in scene node context